Export & import SSL certificates between Windows servers with a PFX file
Overview: Migrating your SSL certificate from one Windows server to another Windows server will require you to export and then import your SSL key pair from server A to server B using a PFX backup file, also known as a PKCS #12 archive file .
Please note that PFX files cannot be provided by Certificate Authorities because PFX archives require the cooresponding private key. Learn more at: How do I download a PFX file?
A. Export a server certificate & private key to a PFX file
- In the Run dialog box, type mmc, and then click OK. The Microsoft Management Console (MMC) appears.
- If you do not have Certificate Manager installed in the MMC, you'll need to install it.
- On the File menu, click Add/Remove Snap In
- Click Add and then select Certificates from the Available Standalone Snap-ins dialog box and click Add
- Select Computer Account and then Local Computer
- The Certificate Manager MMC has been installed
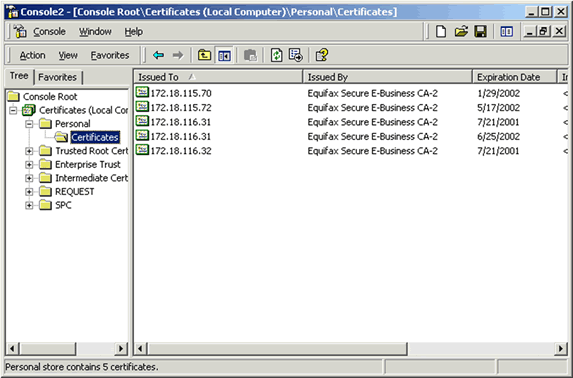
- In the console tree in the left-hand pane expand the Certificates (Local Computer) node, and then the Personal node. Note that to view certificates in the local machine store, you must be in the Administrator role.
- Right-click the certificate you want to export, click All Tasks, and click Export to start the Certificate Export Wizard.
- Click Next.
- On Export Private Key, click Yes to export the private key.
Important: You must export the private key along with your certificate for it to be valid on your target server. Otherwise, you will have to request a new certificate for the target server.
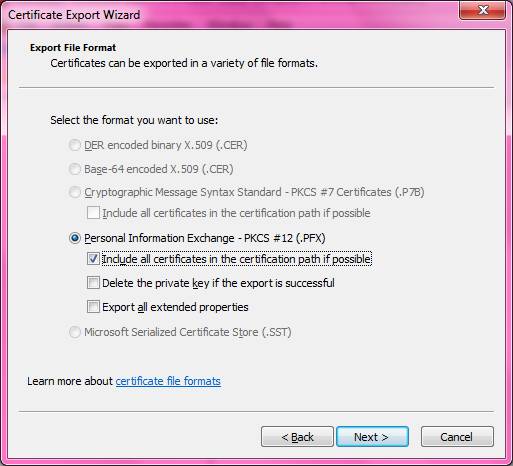
- In the Export File Format dialog box, click the format you want for the certificate. If the certificate has already been formatted, that format is selected as the default (should be .pfx). Click Next.
Do not select Delete the private key if export is successful, because this will disable the SSL site that corresponds to that private key.
Select the "include all certificates in the certification path if possible" checkbox.
- Continue to follow steps in the wizard, and enter a password for the certificate backup file when prompted. Using a strong password is highly recommended because it ensures that the private key is well protected.
- Type the name of the file you want to export, or click Browse to search for the file. Click Next.
- Click Finish to complete the Certificate Export Wizard.
B. Import a Server Certificate from a PFX file
- In the Run dialog box, type mmc, and then click OK. The Microsoft Management Console (MMC) appears.
- If you do not have Certificate Manager installed in the MMC, see step 2 above.
- In the console tree in the left-hand pane expand the Certificates (Local Computer) node, and then the Personal node.
- Right-click on Certificates, click All Tasks, and click Import to start the Certificate Import Wizard.
- On the Welcome to the Certificate Import Wizard page, click Next.
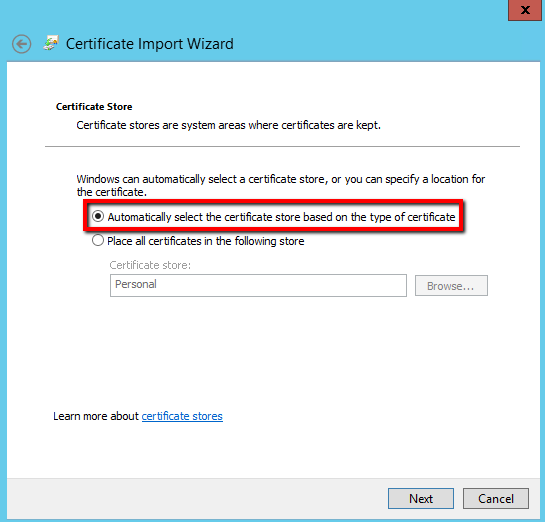
- Follow the instructions to locate and import your .pfx file and then select Automatically select the certificate store based on the type of certificate.
- Click Next.
- Enter the password used when the PFX file was exported and check the Mark the private key as exportable checkbox and click Next.
- Select Place all certificates in the following store: Personal and click Next.
- Click Finish to complete the Certificate Import Wizard.

How to assign an imported SSL Certificate to a website in IIS
- Now the SSL keys are on the target server. Next we assign the certificate to the site in IIS.
- Open the Internet Information Services (IIS) Manager. From the Start button select Programs > Administrative Tools > Internet Information Services Manager.
- In IIS Manager, double-click the local computer, and then double-click the Web Sites folder.
- Right-click the Web site for which you want to assign the imported certificate, and then click Properties. By default it will be Default Web Site, yours may be different.
- Select the Directory Security tab and click Server Certificate in the Secure communications section.
- Click Next in the Welcome to the Web Server Certificate Wizard window.
- Select Assign an existing certificate, Click Next.
- Select the certificate from the list and finish the wizard.
- Stop, then Start the web server for that site.
