Install the certificate on the eToken
Use a Windows computer with administrator rights. You only need Windows once to put the certificate on the hardware; afterward you can sign from Windows, macOS, or Linux with SafeNet installed.
Prerequisites: SafeNet Authentication Client installed, eToken in hand, CertCommand order issued.
Protect both eToken passwords. The eToken Password (PIN) unlocks the certificate for signing. The Administrator Password defaults to 48 zeros (000000000000000000000000000000000000000000000000). Store both in a password manager. Too many failed Administrator Password attempts permanently lock the token—DigiCert cannot recover it, and you must buy a new eToken. See Passwords, lockouts, and reissue.
1. Confirm delivery and copy the initialization code
- Log in to CertCommand and open the code signing order.
-
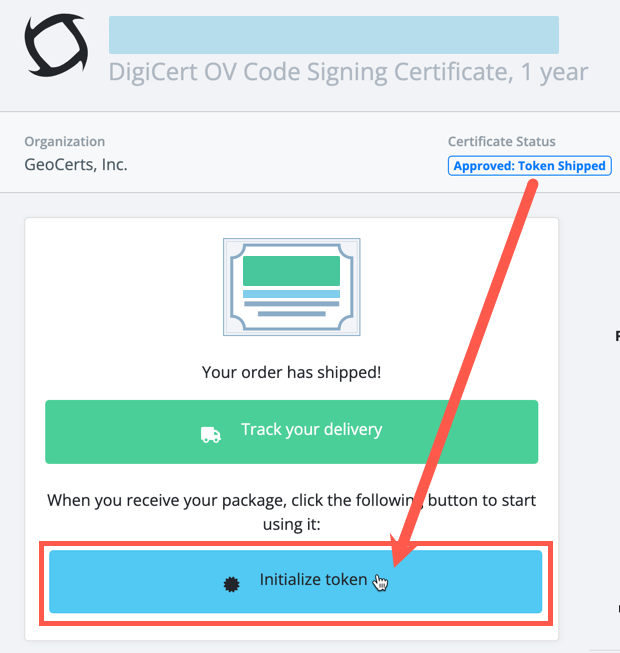
When status shows the token has shipped, click Initialize token (or Install certificate, depending on the order screen).
-
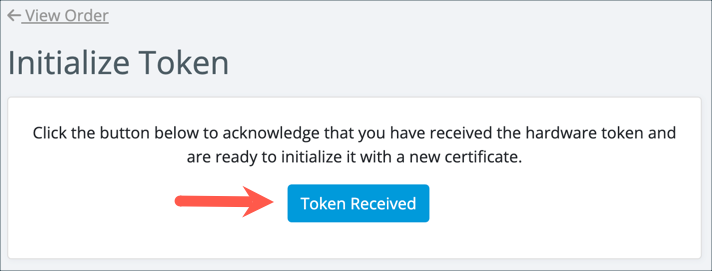
Confirm you have the physical eToken (Token Received).
-
On the install page, copy the initialization code. Keep that page open or paste the code into your password manager. The code expires; if install fails with an unexpected error, you will need a reissue.
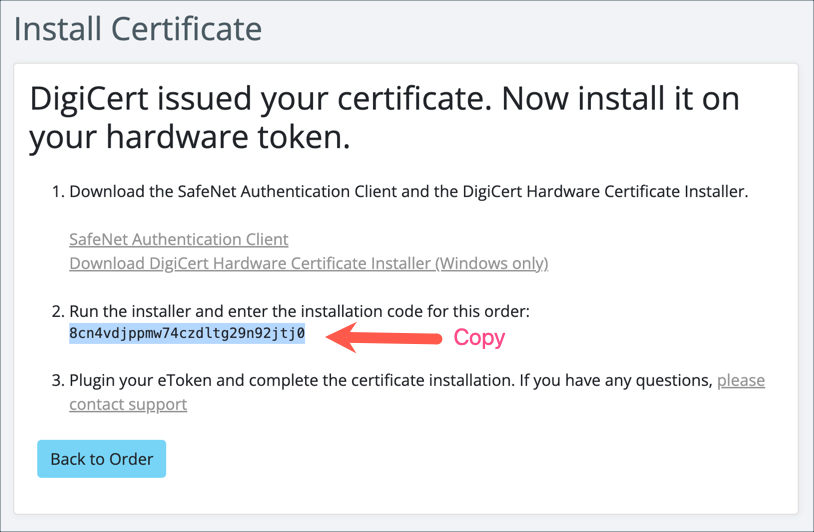
The initialization code is not the eToken Password (PIN).
2. Download the DigiCert Hardware Certificate Installer
Install is Windows only.
Unzip and run the installer application. You also need SafeNet on this same PC.
3. Run the Hardware Certificate Installer
-
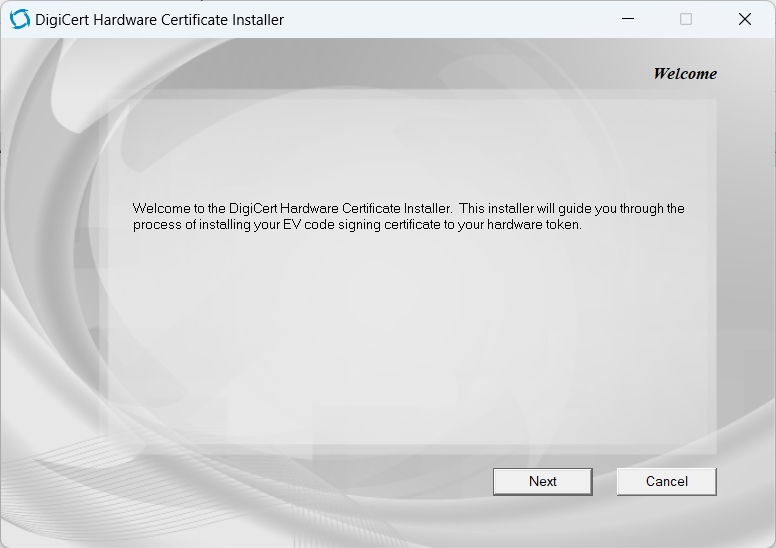
Insert the eToken, then start DigiCert Hardware Certificate Installer and click Next.
-
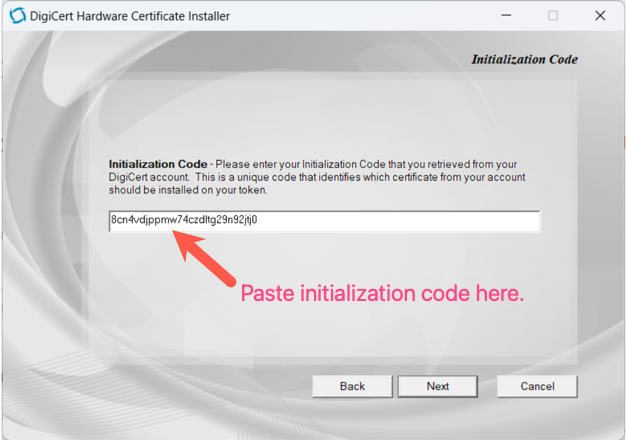
Paste the initialization code from CertCommand and click Next.
-
When the installer detects the token, for a new blank DigiCert eToken check Re-initialize my token and permanently delete any existing certificates and keys.
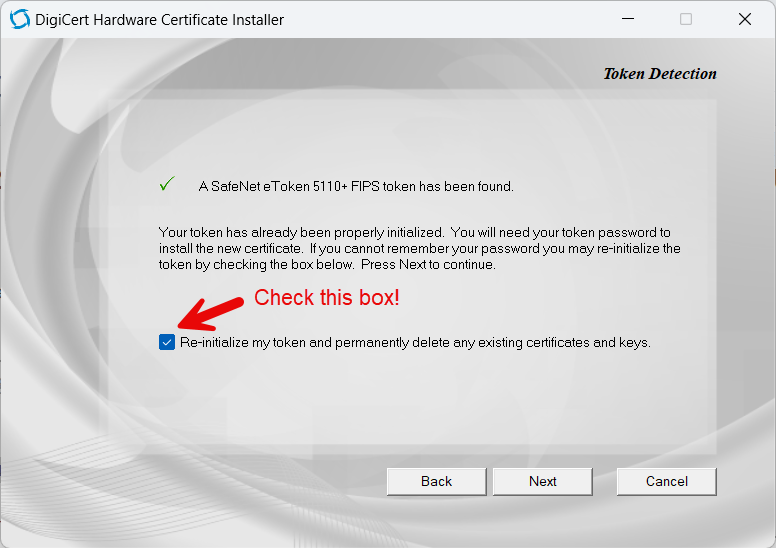
Leave that box unchecked only if you are adding an alternate chain or key type and must keep the current certificate on the token.
-
Choose key type. If unsure, keep RSA and 4096.
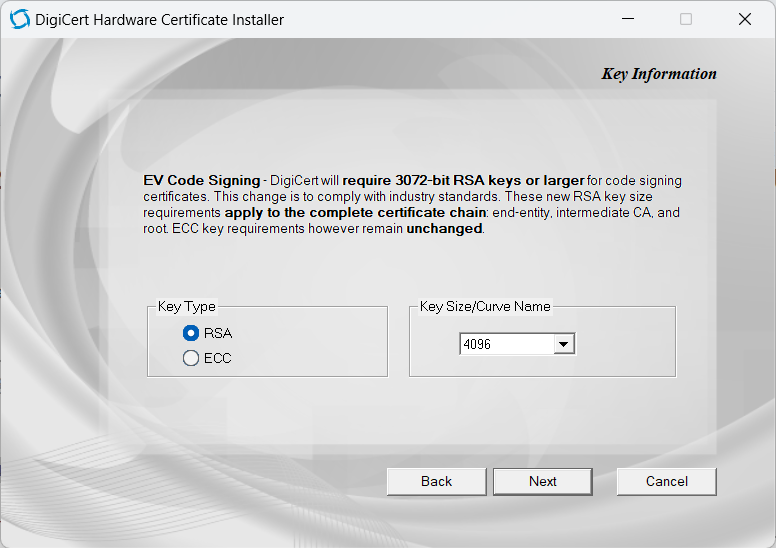
Key type Size / curve RSA (default) 4096 (3072 minimum for current CS rules) ECC p-256 or p-384 -
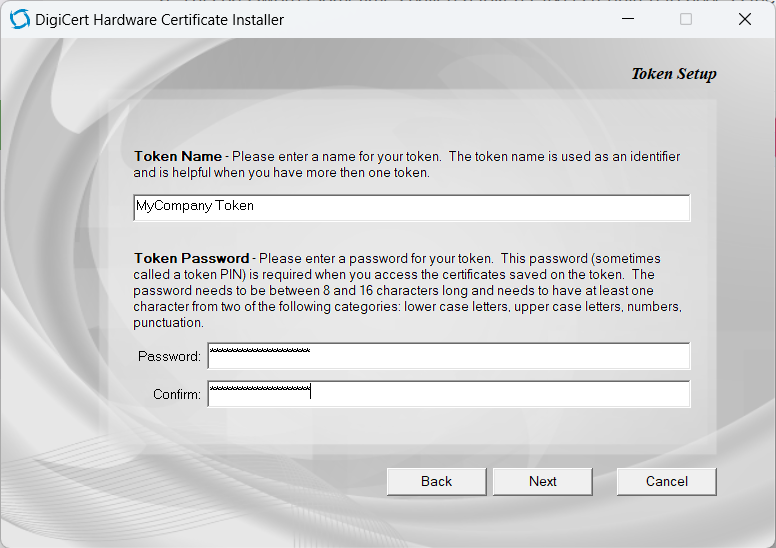
Set a token name (friendly label) and eToken Password (PIN). Requirements are typically 8–16 characters with at least two of: lowercase, uppercase, numbers, punctuation.
-
Check Use factory Administrator Password. Do not invent a new Administrator Password during this first install. Leave the password fields empty. Change the Administrator Password later only after a successful install, and only if you will store the new value in a password manager.
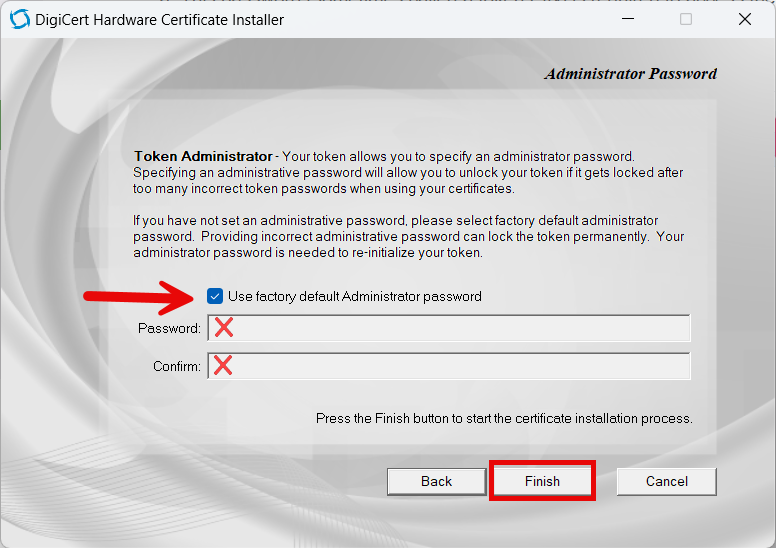
-
Wait. RSA 4096 generation can take several minutes. Do not remove the token until the installer reports success. When every step is checked off, click Close.
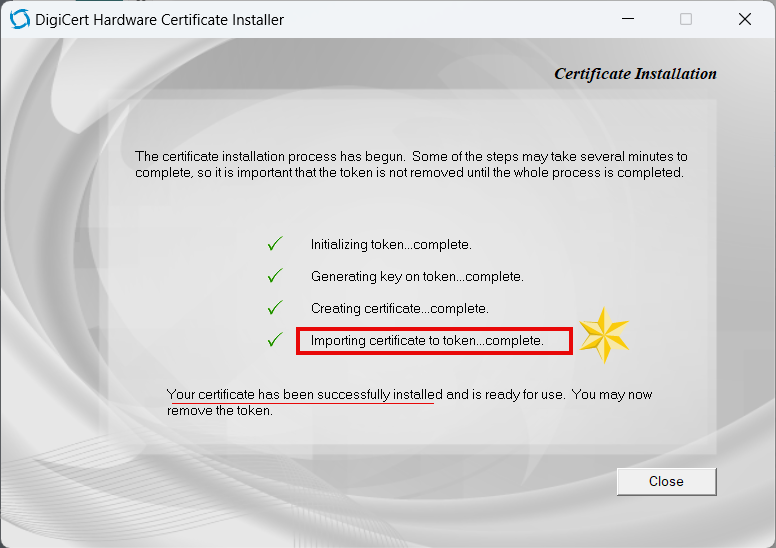
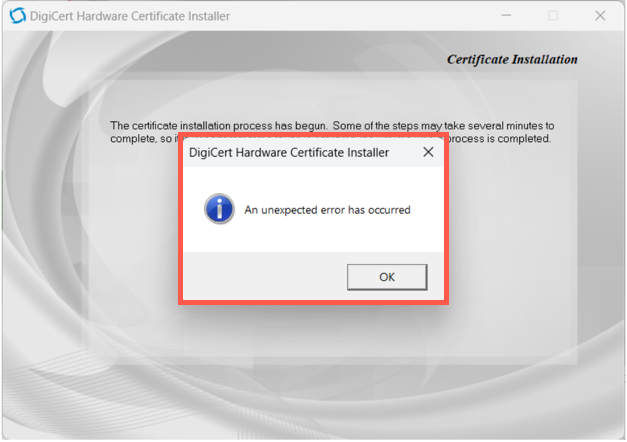
If you see “An unexpected error has occurred”, the initialization code is often expired or already used. Reissue, copy a new code, and run the installer again. See Troubleshooting.
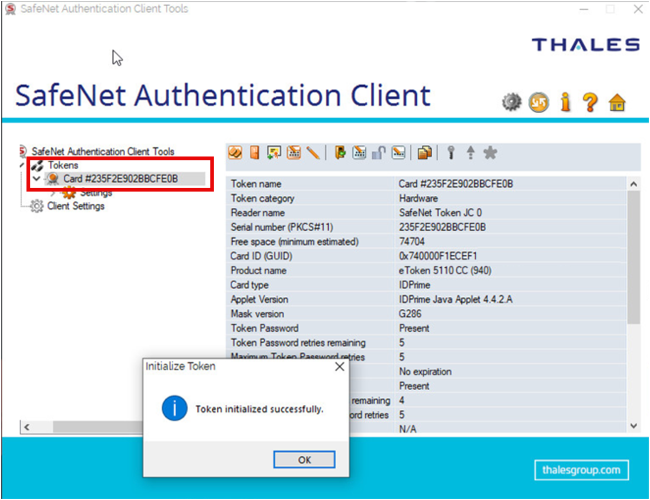
4. Verify in SafeNet
Open SafeNet Authentication Client Tools. The token should appear by the name you set, with the code signing certificate under user certificates.
If the token shows as SafeNet Token JC 0 with a warning icon and all actions greyed out, the device is permanently locked. See Passwords, lockouts, and reissue.
5. Sign with the token
Configure SignTool, jarsigner, or your IDE to use the certificate on the eToken. You will be prompted for the eToken Password each time you sign.
Windows (SignTool) »
Java (jarsigner) »
Related topics
- Install SafeNet Authentication Client
- Passwords, lockouts, and reissue
- DigiCert: Set up your DigiCert-provided eToken