Step-by-Step Guide to Installing a Code Signing Certificate on a DigiCert USB eToken
DigiCert Code Signing Hardware eToken Setup
Follow these steps to set up and install a code signing certificate onto your DigiCert-supplied USB eToken using DigiCert's Hardware Certificate Installer.
Important Warning: Before starting this guide, be aware that installing a new certificate on your SafeNet eToken will erase any previously installed certificates. Do not proceed with the installation on an eToken that holds certificates you wish to keep using.
Pre-requisites
- Ensure that your DigiCert-supplied USB eToken has been delivered and is readily available.
- Make sure you have administrative access to a Windows computer.
Step 1: Confirm eToken Delivery and Collect Initialization Code
If you have the eToken device and are ready to install the code signing certificate, click Initialize eToken from the order details page.
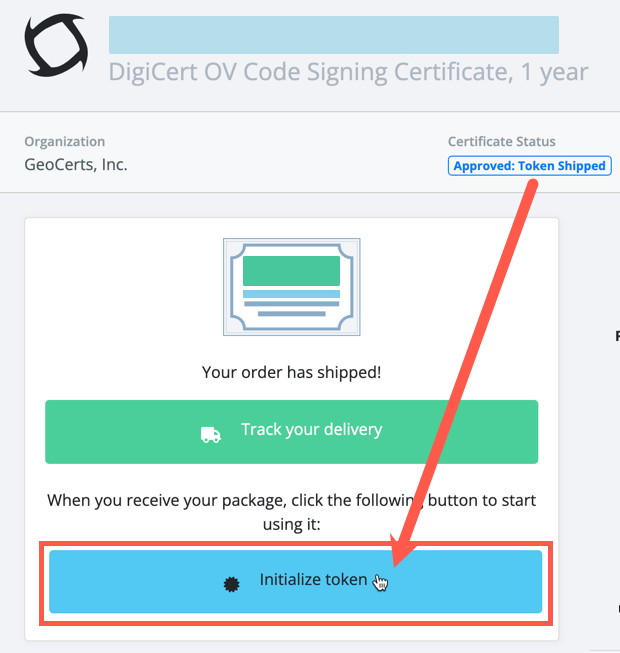
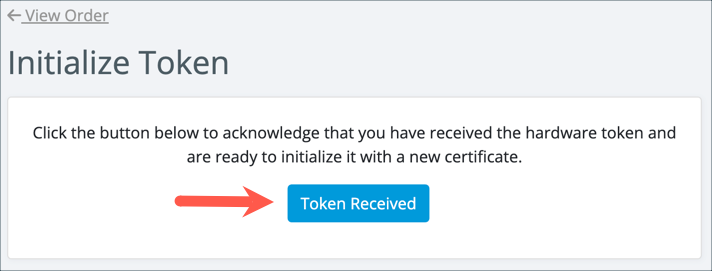
Confirm that you have received the eToken and are ready to install.
Copy the Initialization Code and keep it handy.
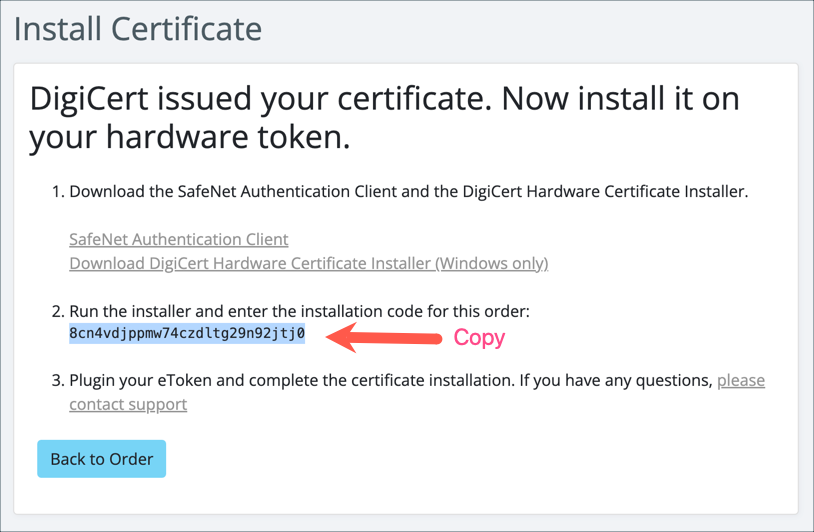
Step 2: Download Software
The Code Signing eToken installation requires two software downloads:
- SafeNet Authentication Client
- DigiCert Hardware Certificate Installer (Windows-only Version)
Step 3: Install the Certificate onto the USB eToken
Insert the eToken into your Windows computer and start the DigiCert Hardware Certificate Installer application. Follow the onscreen prompts with the added instructions for each section below.
Note: you only need a Windows computer once to install the certificate on the hardware device.

Step 4: Enter the Initialization Code
The Certificate Installer software will request your Initialization code. Paste the code here and click Next.

The Hardware Certificate Installer should detect your DigiCert eToken. Since this is a fresh install with no existing certificates, check the box "Re-initialize my eToken and permanently delete any existing certificates and keys."

Confirm that you want to re-initialize this eToken and permanently delete any existing certificates and keys.

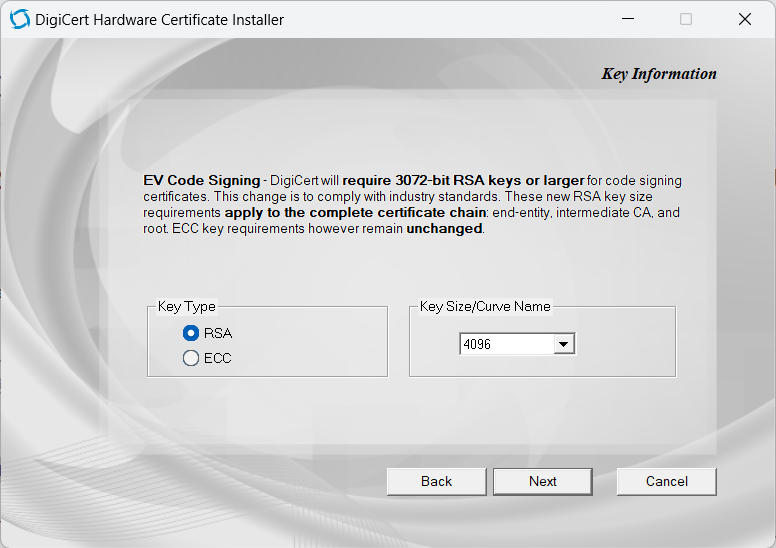
Select Key Type and Key Size. Leave this setting at the default values if unsure about these options.
RSA – standard (default)
- Under Key Type, select RSA.
- Under Key Size/Curve Name, select 4096.
ECC Key Types
- Under Key Type, select ECC
- Under Key Size/Curve Name, select p-256 or p-384.
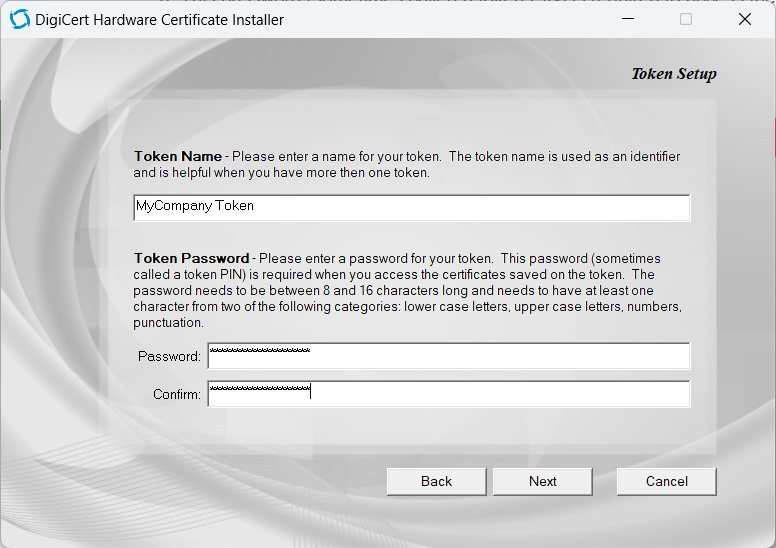
Step 5: Set an eToken Name and Password
eToken Name: A "friendly" name to help you identify this certificate eToken.
eToken Password: Enter a password for your eToken. The password (aka PIN) you choose is required whenever you access the certificates saved on this USB device.
We highly recommend using a password vault (e.g., 1Password, LastPass) to keep track of your eToken passwords. If you get locked out of this device, you cannot recover access and must buy a new eToken.
Password Requirements:
- 8-16 characters long
- At least one character from at least two categories: lower case letters, upper case letters, numbers, and punctuation.
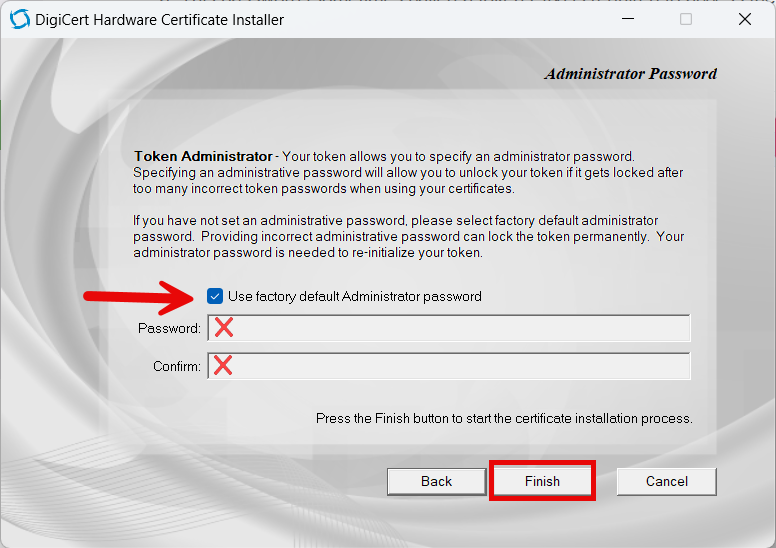
Be sure to check the box "Use factory Administrator Password." DO NOT ENTER AN ADMINISTRATOR PASSWORD at this time!
We recommend waiting to change and reset the manufacturer's default Administrator Password once you successfully initialize and install the code signing certificate and keys on the hardware eToken (See "About eToken Passwords" below).
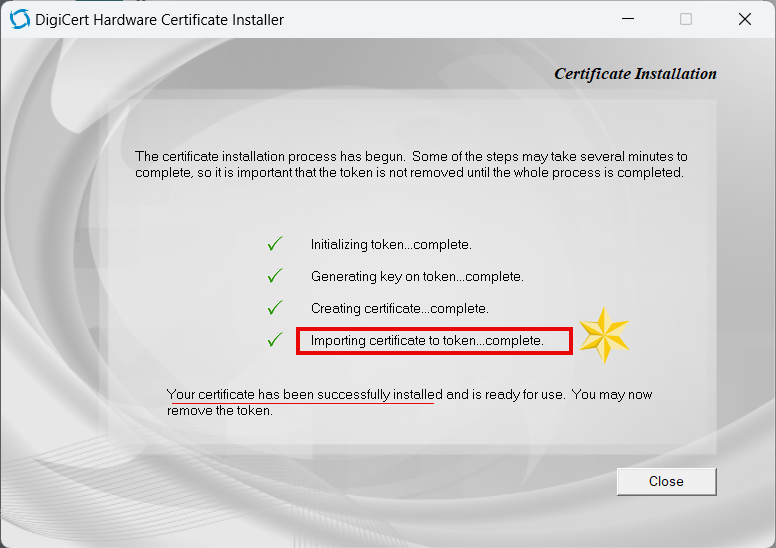
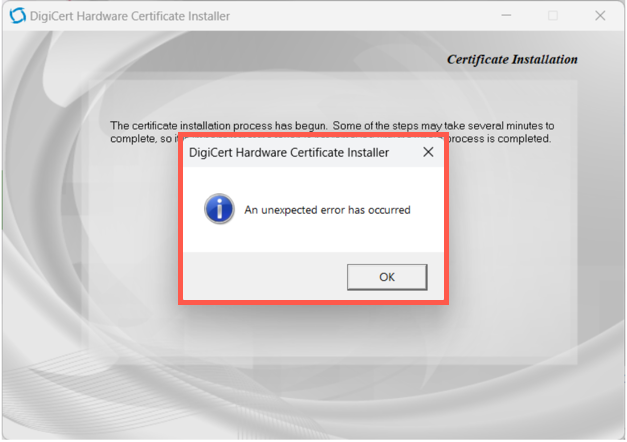
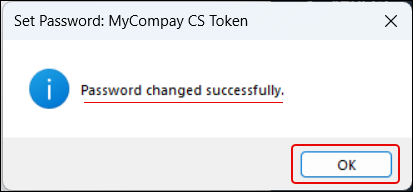
The installation has begun, and the steps can take several minutes. Eventually, each step will be checked off. You can close the software when the installer confirms the installation was successful.
If you get an "An unexpected error has occurred" message, it usually means that the Initialization Code has expired. You will need to reissue your code signing certificate. Please get in touch with support.
Step 6: Verify the Certificate Installation
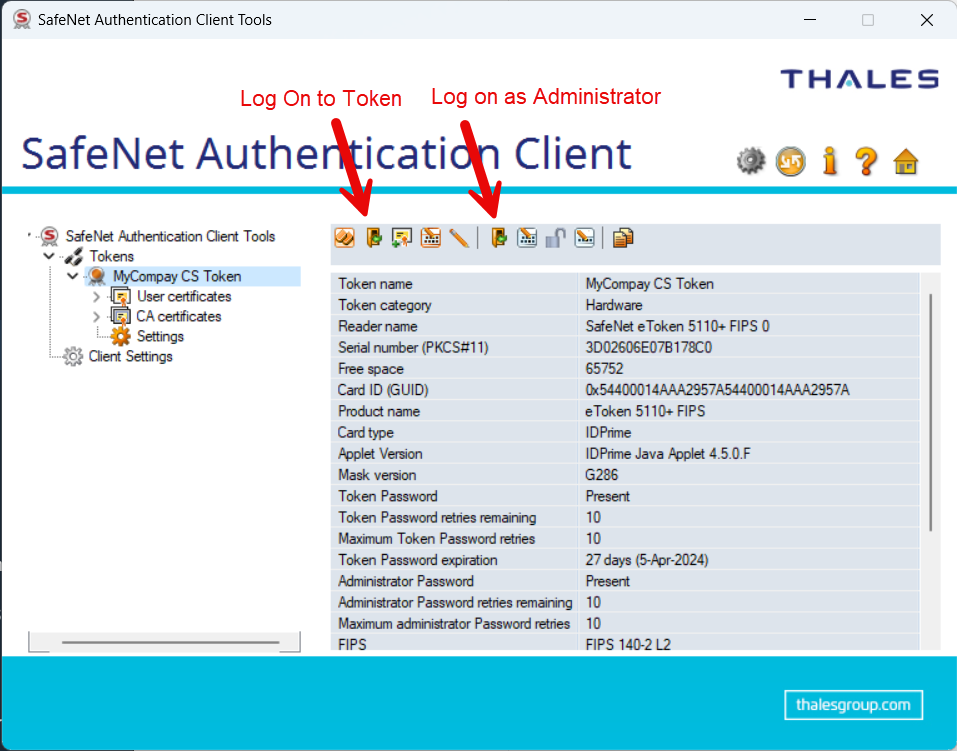
After the DigiCert Hardware Certificate Installer installation is complete, open your SafeNet Authentication Client application to verify that the certificate is correctly installed on the eToken.
The SafeNet Authentication Client software is necessary to interact with the eToken and use the certificate stored on it to sign your code.

Step 7: Configure Your Development Environment
Configure your code signing tool (Microsoft SignTool, Java JarSigner, etc.) or development environment to use the certificate from the USB eToken. This often involves specifying the path to the eToken and entering the eToken's password within your development or code signing software.
Additional Notes
- Safekeeping: Always keep your USB eToken in a safe place to prevent loss or theft, as it now contains your secure digital key for code signing.
- Password Protection: Remember the password you set for the eToken. You must enter it every time you access the certificate for code signing purposes.
About eTokenPasswords
Warning: The SafeNet eToken uses multiple passwords for authentication. If you enter the Administrator's Password incorrectly too many times, the eToken is permanently locked.
You need to keep track of two passwords. One is the eToken Password you set in STEP 5 above, and the other is the Administrator Password you left as the factory default in STEP 5.
- eToken Password: Sometimes called the PIN, the eToken Password is required to access the certificates saved on the eToken. If you lose the eToken Password, the administrator can log in with the Administrator Password to reset it, OR you can reissue and re-install your code signing certificate.
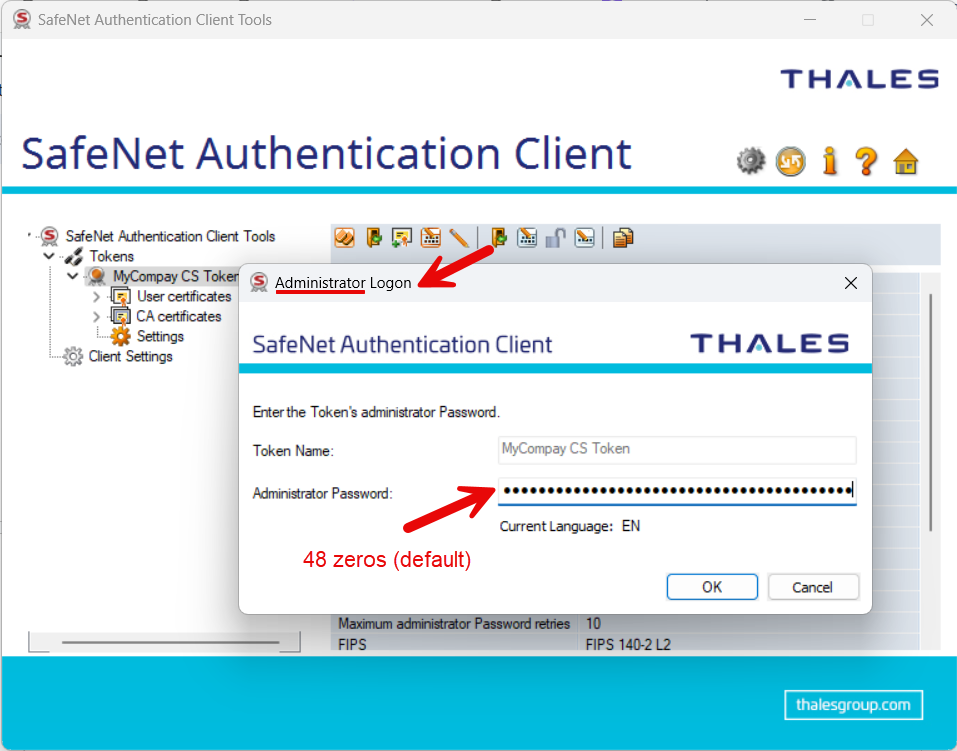
- Administrator Password: The default Administrator Password is "0" 48 times (000000000000000000000000000000000000000000000000) as set by the eToken manufacturer. An administrator can reset a new password for a locked eToken after too many password attempts. However, If the Administrator Password is lost, you are permanently locked out of the eToken and must purchase a new one. DigiCert has no way of overriding a locked eToken.
Troubleshooting eTokens
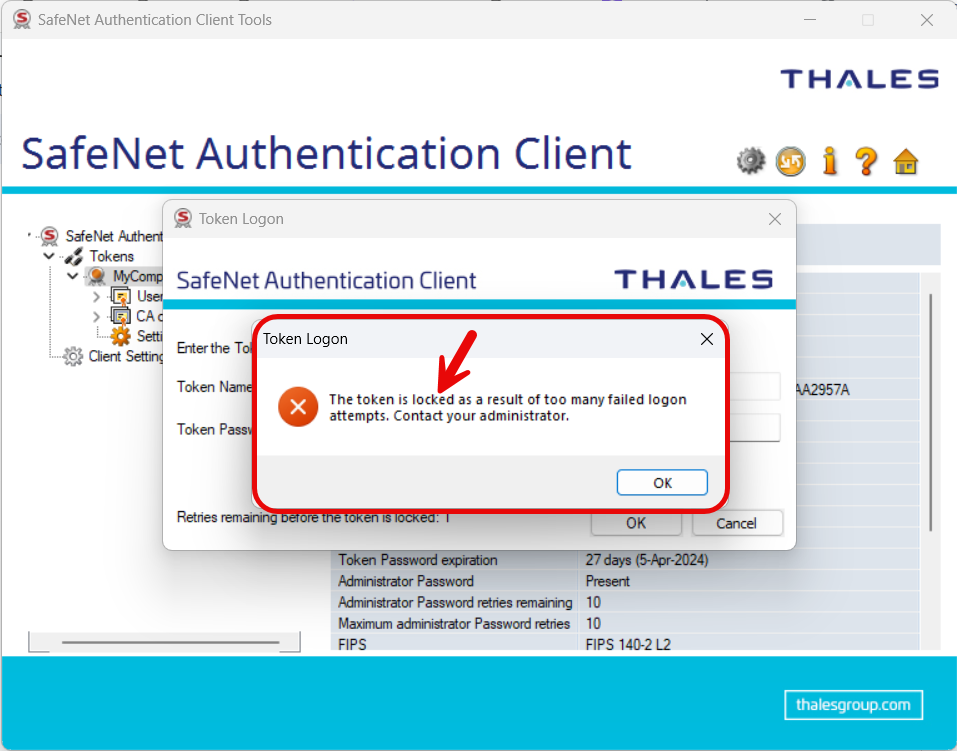
1. My SafeNet eToken is locked after too many failed password attempts (10).
You have two options:
OPTION 1: Reset the eToken Password (easiest and recommended)
Log in as Administrator (48 zeros) and set a new eToken password.

OPTION 2: Reissue your certificate
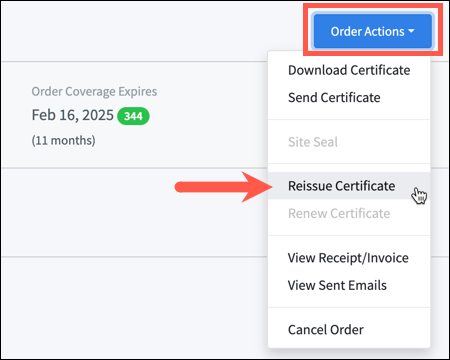
Reissue, re-initialize and re-install your code signing certificate on the eToken. It's like starting from scratch—you're wiping everything out and starting from STEP 3 above. To reissue your code signing certificate, log in to your CertCommand account at https://geocerts.com/login, select the order ID, and choose Order Actions > Reissue Certificate. If the Reissue Certificate option is greyed out, please contact support.
2. I lost my SafeNet eToken Administrator password.
The eToken manufacturer sets the default administrator password as 48-zeros. If you change the default administrator password and then lose it, you will not be able to reset the device, and it is unrecoverable. Please contact GeoCerts Support to order a new eToken.
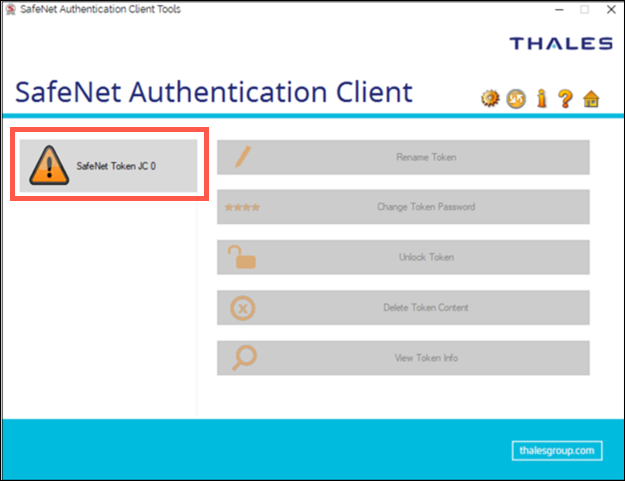
3. My token name appears as "SafeNet Token JC 0."
Your eToken is now permanently disabled due to incorrect password attempts. You will not be able to reset the device, and it is unrecoverable. Please contact GeoCerts Support to order a new eToken.